Saturday, January 28, 2012
Latte Wedding Cake
I fell in love with this couple when I first met them....and their wedding was everything I would want if I were to do it again (not that I am planning anything...I am VERY HAPPILY MARRIED!). The cake design, was something I had seen in a magazine and fell in love with, and was thrilled when they chose it to base their wedding cake from. Now while I was in love with the cake, the couple, the venue, and everything else, this was by far the most stressful wedding I have ever made the cake for...so far!!!
The cake baked and covered beautifully, but those darn Bride and Groom figurines were an absolute nightmare! I made them without too much drama, but this last week has been raining, and when it hasn't been raining, it has been so muggy and humid it was a nightmare!!! All of the fellow cake decorators out there will understand completely!
Now, we have air conditioning, and my wonderful husband discovered that they have a "dry" mode, which removes the humidity from the room.... you would think that this would solve the problem...but no, every now and then, I would go into the room to discover the figurines so shiny and sticky that I was afraid they were going to melt completely and give the wicked witch from the west a run for her money. Thankfully, as shiny as they got, they never lost their shape, and in the end I think they look remarkably good!
As I mentioned above the cake design was based on one found in a Wedding Cakes Magazine, but we made a few alterations to make it our own. For the bottom tier, we liked the double height cakes, but thought they were a bit extreme, so I suggested rather that doubling the height, we just increase it by half. So the bottom tier is a triple layer caramel mud cake with white chocolate ganache. It stood approximately 14cm high. The top tier is a toblerone mud cake, with two layers filled and iced with dark chocolate ganache.
Friday, January 27, 2012
Bridal Shower
On the menu:
Chocolate Dipped Marshmallows
Cappuccino Macaroons
Chocolate Ganache & Raspberry Tartlets
Coconut Ruffle Cake
Red Velvet Mini Cupcakes with Vanilla Buttercream
Zucchini Squares with Garlic & Chives Cream Cheese
Pesto Cheese Heart Pastries
Cucumber Rounds with Herb Cheese
It was a lot of hard work and baking yesterday, but the table looked fantastic and the ladies had a lovely morning.
Saturday, January 14, 2012
Jungle Birthday
I love this cake, it makes me smile....and it was so lovely seeing his Mum's face when I delivered the cake, she was just thrilled with it. I know a lot of professions go unrewarded...my husband is a farmer, and he doesn't really get people saying "thank you so much for those zucchini, they must have taken forever to grow"....but I am very lucky that when I deliver a cake, I get so much praise, and excitement it makes all the late nights worth while, and I drive home on the biggest high, with a huge grin on my face.
HAPPY BIRTHDAY HUGO!!!
Sunday, January 1, 2012
Piped Wedding Cake
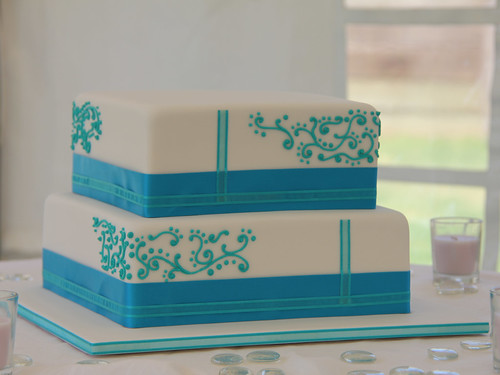
Both tiers are chocolate mud cake, decorated with teal ribbon and royal icing piped scrolls.
The cake was to have silver monogram letters on the top tier, however on delivery, I was told that there wasn't anything to go on top.....I whipped out my piping bag, and added some more scroll work over the top corners of the cake, but forgot to retake the picture.
Thankfully, I went to school with the photographer, so I am sure she will email me a picture :-)
Saturday, December 31, 2011
Funky 16th Birthday
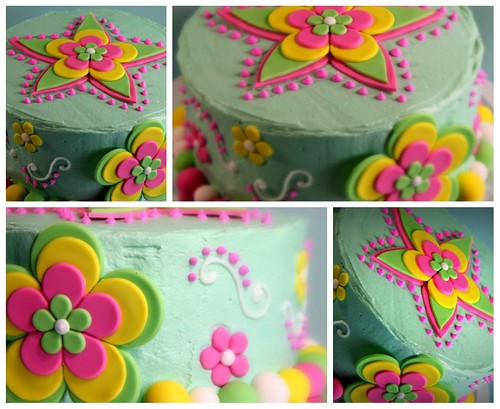
My second last cake for 2011, was this triple layer vanilla butter cake, filled and iced with vanilla buttercream and decorated with fun and funky fondant flowers. The cake was finished off with some royal icing detailing. I think the flowers have a bit of a 1970's style...very funky!
Saturday, December 24, 2011
40th Birthday Party
(Carrot, Yellow Green and Red Capsicum in French Onion Dip)
Beside were some Kabana wraps
(Cream Cheese, Tomato Relish, Lettuce & Kabana in a Lavish Bread)
Mini Quiches are always a hit with the kids...
Quiche Lorraine
Tomato Salsa
Corn & Capsicum
Beside is a cheese and cracker platter
Good old fashioned Chocolate Spiders
(made by my eldest son)
And the cake!!!
Friday, December 2, 2011
How to make Candy Cane cupcake toppers
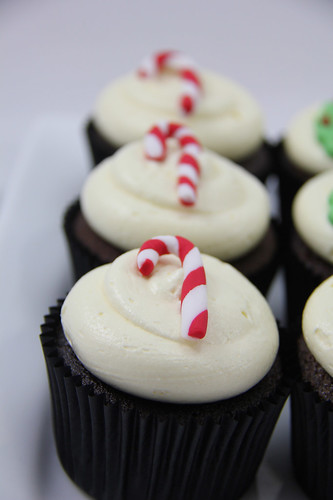
I recently made 30 gift boxes of Christmas cupcakes, with 6 cupcakes in each, all with their own decoration....Candy cane, Snowflake, Christmas tree, Christmas wreath, Holly and Stars. Here is a quick "how to" make the Candy canes.
You will need:
50g red fondant
50g white fondant
a little CMC
A hint to make red fondant, colour your fondant as red as you can, then leave it overnight for the colour to darken.
Mix your cmc into your red and white fondant, this will help it dry.
Roll out half of your white fondant into a long sausage, then do the same with the red.
Pinch the red and white sausages together at one end, then twist them together until they look like a candy cane, and the two colours are stuck together.
Cut your stripy sausage into equal lengths (how long depends on how big you would like your candy cane) Mine were approx 6cm, then shape into the candy cane and place on a baking tray lined with baking paper to dry.
I like to leave my toppers for at least a week to dry completely which will help them to keep their shape after being placed on wet buttercream icing.
Happy Christmas baking :-)